You are here: Experiment Guide > MIRO > Operation > Capturing Optical Images

Capturing Optical Images

This procedure assumes that you have already gone through the Calibration and Registration procedures.

  1. Set up the Dimension Icon for the imaging mode will use. The system must be set up and ready to acquire both optical and AFM data.
 
  1. Optimize optical images in the video panel (i.e, ensure that the probe and sample are in focus in the setup and navigation veiws, respectively.
  1. Enter the Check Parameters view, then click the MIRO icon.
 
  1. Engage on the sample surface.
NOTE: If MIRO is open on engage, the system will automatically capture an optical image prior to engaging the tip.
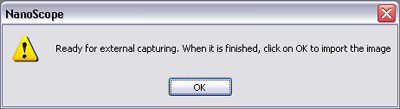
  1. Click the Capture optical/video image icon.
NOTE: If the button is inactive, click in the Parameters List of the main window.

If you are using an internal camera:

The optical image from the microscope computer opens automatically in the MIRO Canvas.

NOTE: For single-click capture and registration (recommended for Dimension Icon):
  1. Using an internal camera, pre-select the registration profile using the Image Import Config button in the Config tab.
  2. Choose the Don’t Show radio button in the Dialog Show Options panel.

If you are using an external camera:

  1. A window opens prompting you to import an optical image:

  1. Click OK to open the file browse window.

  1. Select the tiff file and click Open. This will open the optical image in the MIRO canvas.


www.bruker.com Bruker Corporation
www.brukerafmprobes.com 112 Robin Hill Rd.
nanoscaleworld.bruker-axs.com/nanoscaleworld/ Santa Barbara, CA 93117
   
  Customer Support: (800) 873-9750
  Copyright 2010, 2011. All Rights Reserved.